- TemplatesTemplates
- Page BuilderPage Builder
- OverviewOverview
- FeaturesFeatures
- Layout BundlesLayout Bundles
- Pre-made BlocksPre-made Blocks
- InteractionsInteractions
- DocumentationDocumentation
- EasyStoreEasyStore
- ResourcesResources
- DocumentationDocumentation
- ForumsForums
- Live ChatLive Chat
- Ask a QuestionAsk a QuestionGet fast & extensive assistance from our expert support engineers. Ask a question on our Forums, and we will get back to you.
- BlogBlog
- PricingPricing
How to Create Sections
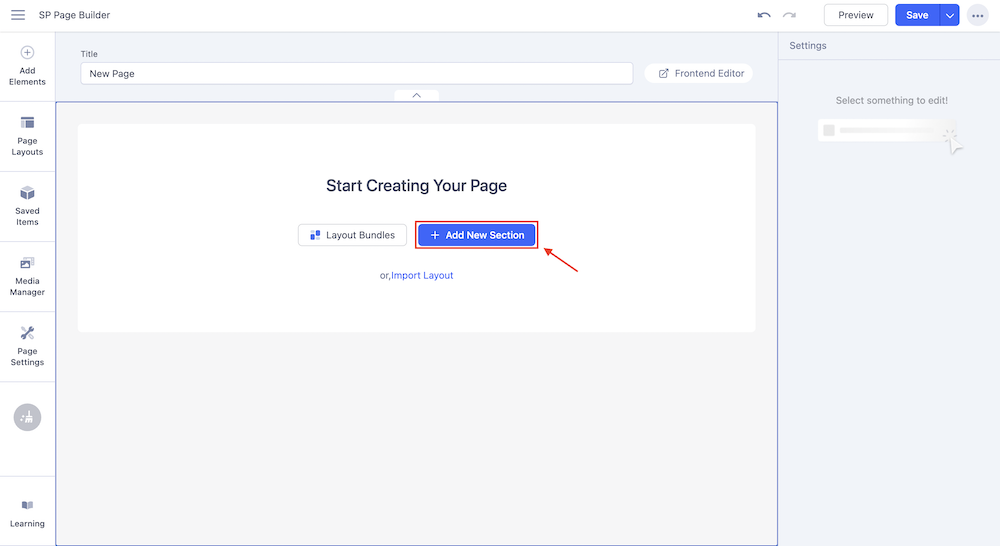
In order to start adding addons to your page, you must create sections first. These sections give you an initial structure to your page.
Once you have created a new page, you start creating your sections by clicking on the ‘+ Add New Section’ button. This will display the option from where you can choose your section layout.
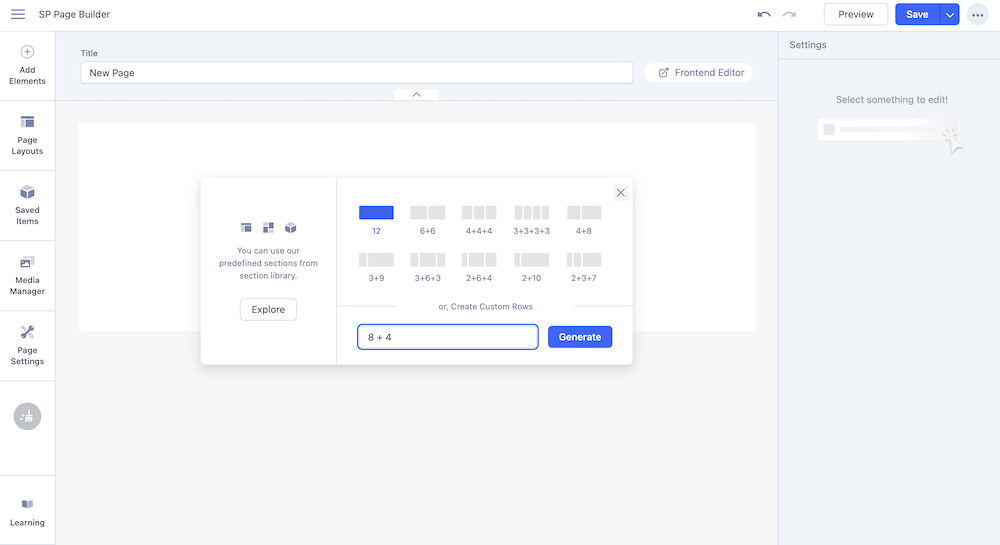
You can either choose your section layout from the given 10 different layouts or generate your layout from the “Create Custom Rows” field.
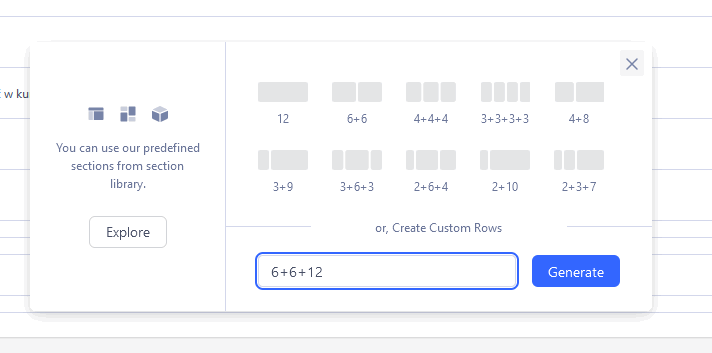
Just remember that with the total being 12, the minimum number of Columns is 1 and the maximum number of Columns is 12. You can also build a gris that contains more than one row using the Custom field. In the below example, we used 6+6+12. It means: in one section create the first row with two columns and the second row with one wide column. Of course, you can build a much more complex grid.
Once you have created your first section, you can keep adding more sections just by clicking on the “+ Add Section” button that appears upon hovering on the created section.
Section Options
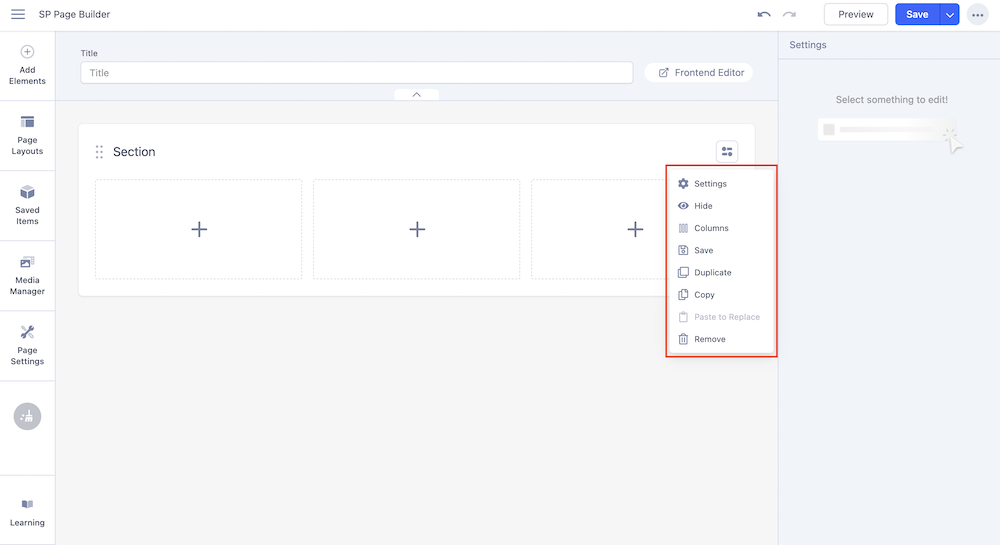
- Settings: This will open the section-related settings on the right side of the canvas. The settings panel comes with all the necessary section settings arranged in 4 separate tabs. Click here to find out more.
- Hide: Any section you choose to hide will not appear in the Preview of that page. However, the section will not be deleted and you can choose to show the section whenever you want just by clicking on the “Show” from that section’s settings.
- Columns: You can restructure your section’s columns from this option.
- Save: This will save the section including the settings (if you have made changes to the settings). You can reuse this section any time later just by retrieving it from the Saved Sections option.
- Duplicate: Duplicating a section will instantly create a copy of the section directly below it.
- Paste to Replace: If you have copied a section, you can choose to replace the currently selected section with the copied section.
- Remove: Delete the selected section.
Rename Section
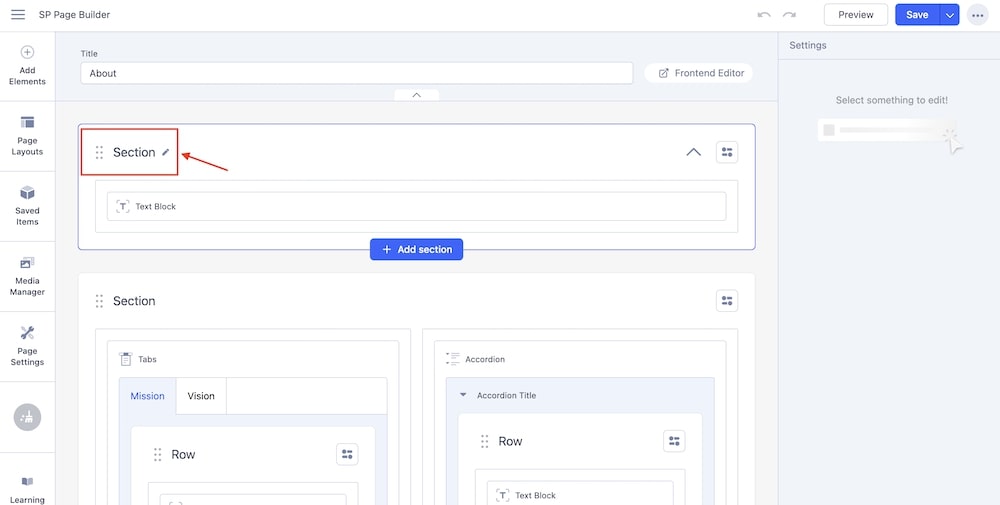
When you hover over a section you will find a ‘Pen Icon’ beside the Section on the top. Click on the ‘Pen Icon’ to rename the Section.
Premade Sections
The premade section is a huge storehouse of ready-to-use sections that you can directly use on your page. You can find the Premade Sections from the main menu bar’s Add Elements > Sections Library. Simply drag and drop your desired premade section from the list to your section.
Saved Sections
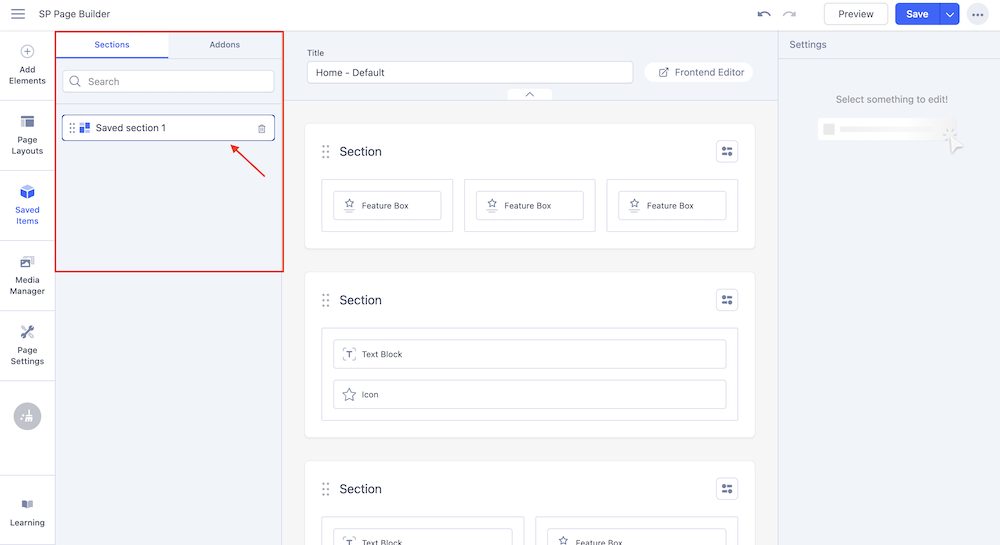
Access the sections that you have previously saved from the Saved Sections option. Simply go to the Saved Items from the main menu bar and choose the Sections tab. Here you can find all your saved sections. Simply drag and drop the section wherever you prefer.
Collapse Sections & Drag and Rearrange Sections
To enhance the user experience with the latest backend editor, the section rearranging method has been simplified. Simply drag and drop your selected section throughout the page. This feature comes in handy when you want to drag around a large and complex section through the page.

