- TemplatesTemplates
- Page BuilderPage Builder
- OverviewOverview
- FeaturesFeatures
- Layout BundlesLayout Bundles
- Pre-made BlocksPre-made Blocks
- InteractionsInteractions
- DocumentationDocumentation
- EasyStoreEasyStore
- ResourcesResources
- DocumentationDocumentation
- ForumsForums
- Live ChatLive Chat
- Ask a QuestionAsk a QuestionGet fast & extensive assistance from our expert support engineers. Ask a question on our Forums, and we will get back to you.
- BlogBlog
- PricingPricing
Price List
The Price List addon allows you to display the information of a product as a single block. This block consists of the Product's Name (Title), Description (Content), Image (Media), as well as its Price.
This addon is really useful for an eCommerce site’s Product Page, a Restaurant’s menu, etc. It helps save time as it’s a ready-made block and you can simply edit the placeholder information to that of your products.
How to Add Price List
To add a Price List addon, open the Addons Panel. This can be accessed through the Sidebar or by clicking the plus icon inside a Row. Scroll down to the Content section and drag & drop this addon to where you want to place it.
You can add more Price List blocks to make it a list.
Price List Settings
Now it’s time to edit its placeholder content to display real information. Do this by either clicking on the text directly or by opening the Price List Settings from the inline editor.
Title
On the Title tab of the Price List Settings, you can enter the Title, set its HTML element hierarchy, and also adjust the Top and Bottom Margins.
Content
On the Content tab, enter the item’s content. You can also customize the style of your content from here as this tab is actually a third-party rich text editor known as TinyMCE.
You’ll find a dropdown at the top-left corner with several options like Headings, Inline, etc. From here, you’ll be able to select the HTML elements you want your content to consist of.
And the three-dot icon on the top-right gives you even more options to customize your Content like font size, alignment, list, image upload, etc.
Media
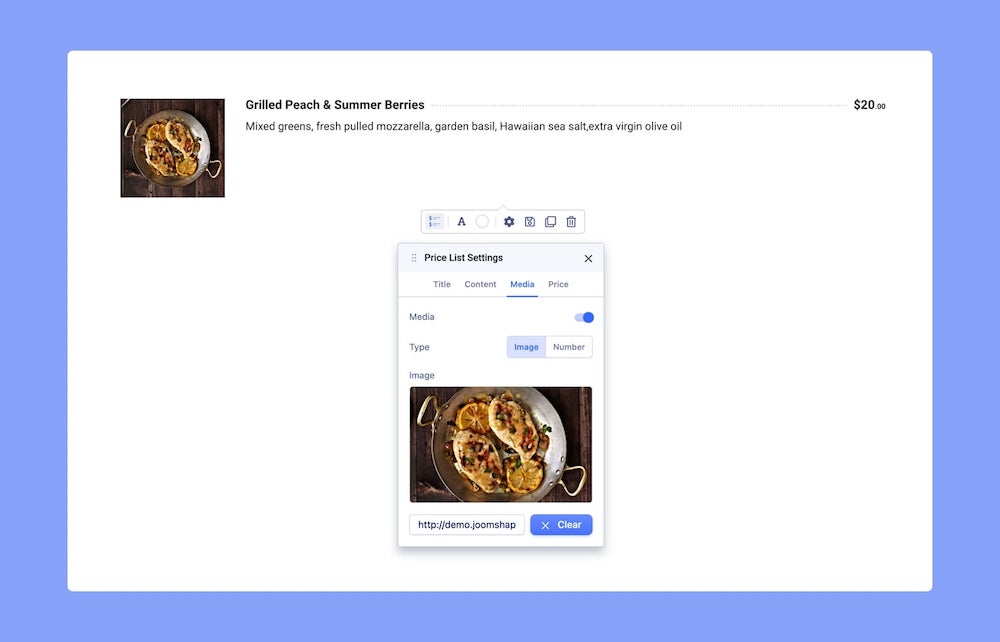
To add Media to your Price List addon, go to the Price List Settings from the inline editor and click on the Media tab.
Media: Click on this toggle to add media to your Price List.
Type: For the Price List addon, the Media can be either an Image or a Number. Select the type you want to add.
Choose Image: If you set the Type as Image, then this button will appear. Click on this to open the Media Manager and select the image you want from here. You can also upload an image from here.
URL: Another way to add an image is to simply paste its URL into the text field at the bottom of this window.
Number: Set the Type as a Number and enter the number you want into the field below.
Price
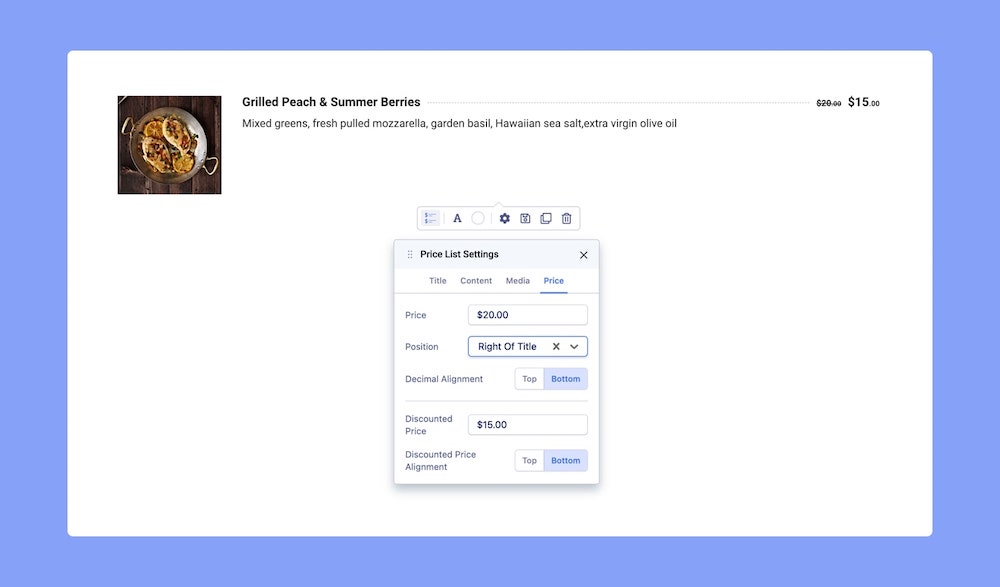
To set the price of your product, open the Price List Settings and go to the Price tab.
Price: Enter the Price along with the currency symbol.
Position: Select the Price’s Position. Options include With Title, Right of Title, and Bottom of Content.
Decimal Alignment: Set if the Decimals will be aligned to the Top or Bottom.
Discounted Price: If the item is on sale, you can set the Discounted Price from here.
Discounted Price Alignment: Set the Discounted Price’s Alignment as Top or Bottom.
Typography Settings
Click on the ‘A’ Letter icon on the inline editor to open the Typography window. Here, you can adjust the Font, Font Size, Line Height, etc for the text in your Price List. For detailed information on Typography check out this documentation.
Color Settings
Change your Price List’s color scheme using the Color Settings. Click on the Circle icon from the inline editor to open this window. Here, you will be able to change the color for the Title, Content, Price, and Discount. Clicking on the color box will open the Color Picker window where you can easily select the color you want.
More on Color Settings here.
Price List General Settings
On the General tab of the Settings Panel, you’ll find further options to customize your Price List. To access these settings, simply click on the Settings icon on the inline editor.
Divider
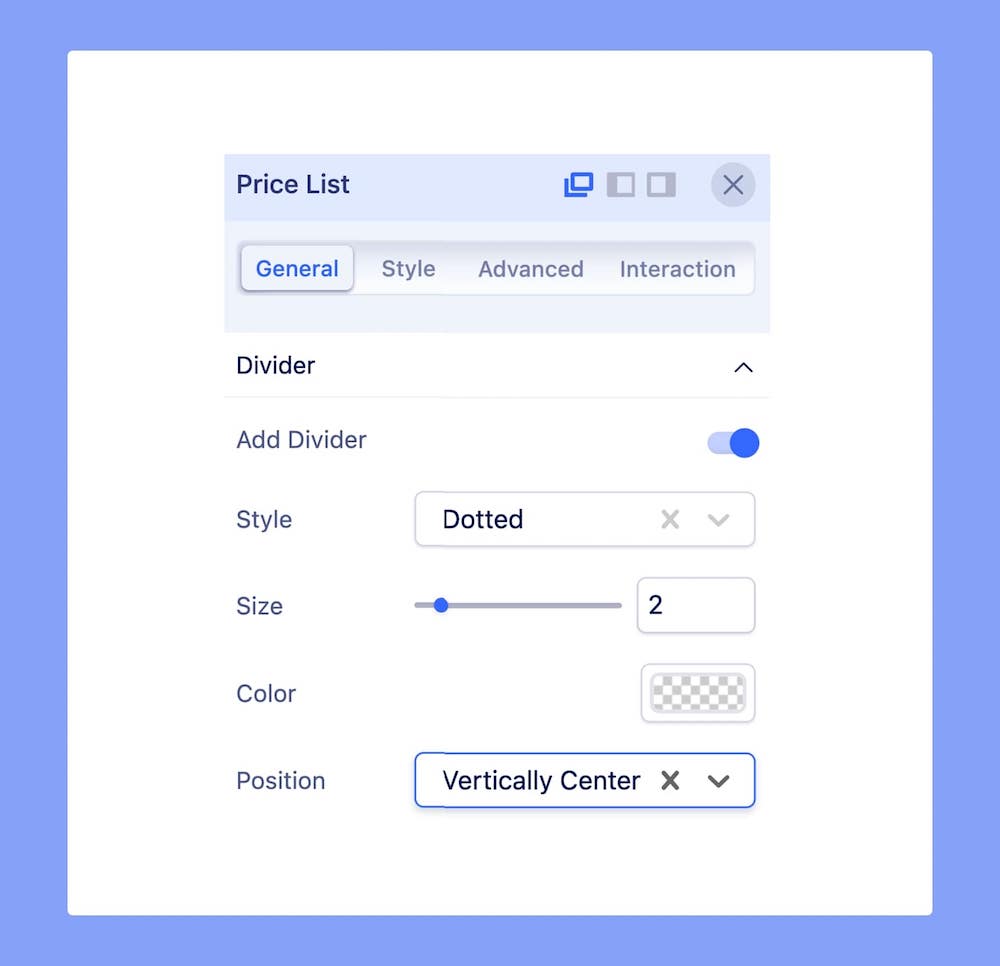
When the Price Position is Right of Title or Bottom of Content, a Divider appears as part of the Price List addon. (Note that you won’t be able to see this section of settings if Price Position is not one of the above-mentioned options.) You can customize this Divider from here.
Add Divider: Enable or disable the Divider from here.
Style: Select the Divider’s style. Options include Solid, Dotted, Dashed, and Double.
Divider Width: Define the width of the Divider that will appear after Pricing, separating it from the list of Features.
Divider Color: Define this Divider’s color.
Position: Set the Divider’s position. Options include Vertically Center, Vertically Bottom, and After Title and Price.
Media
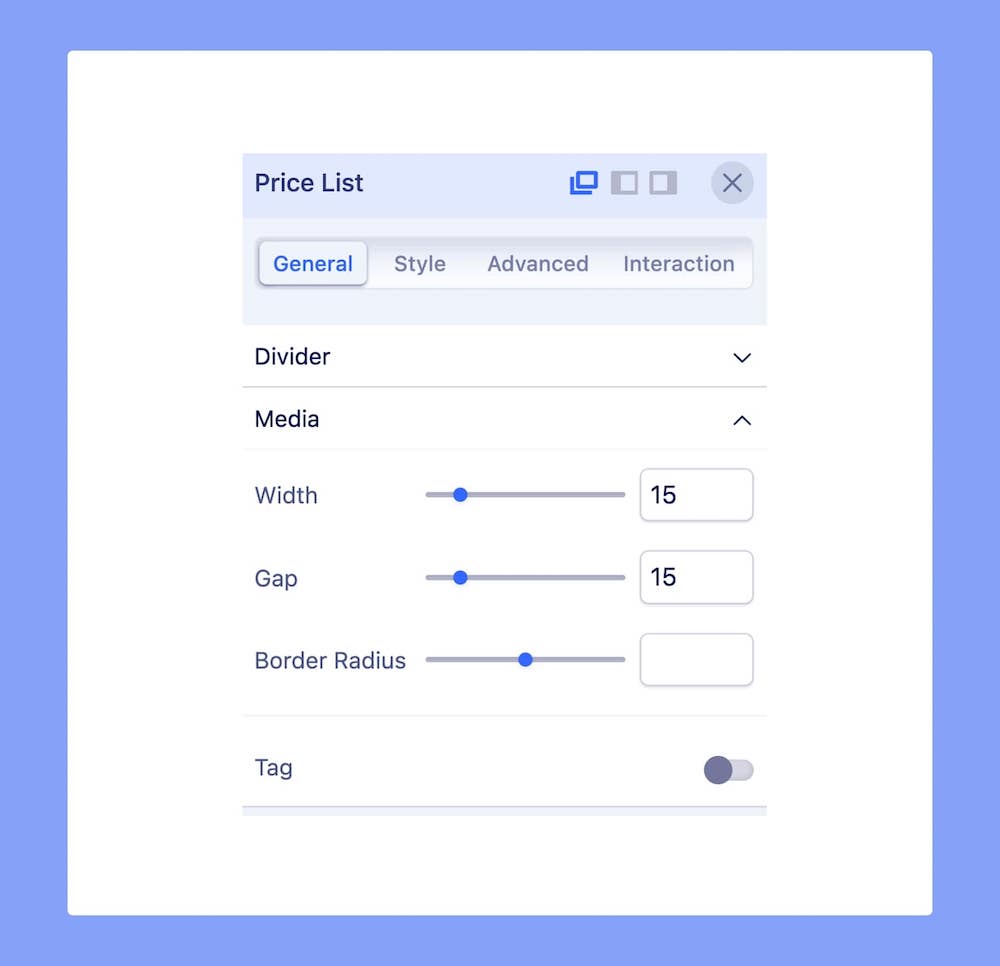
Customize the look of the Media element to suit your needs here. You’ll find the following options:
Width: Define the width of the Media.
Gap: Define the space between the Media and the other elements.
Border Radius: Use this option to round the edges of the Media.
Tag
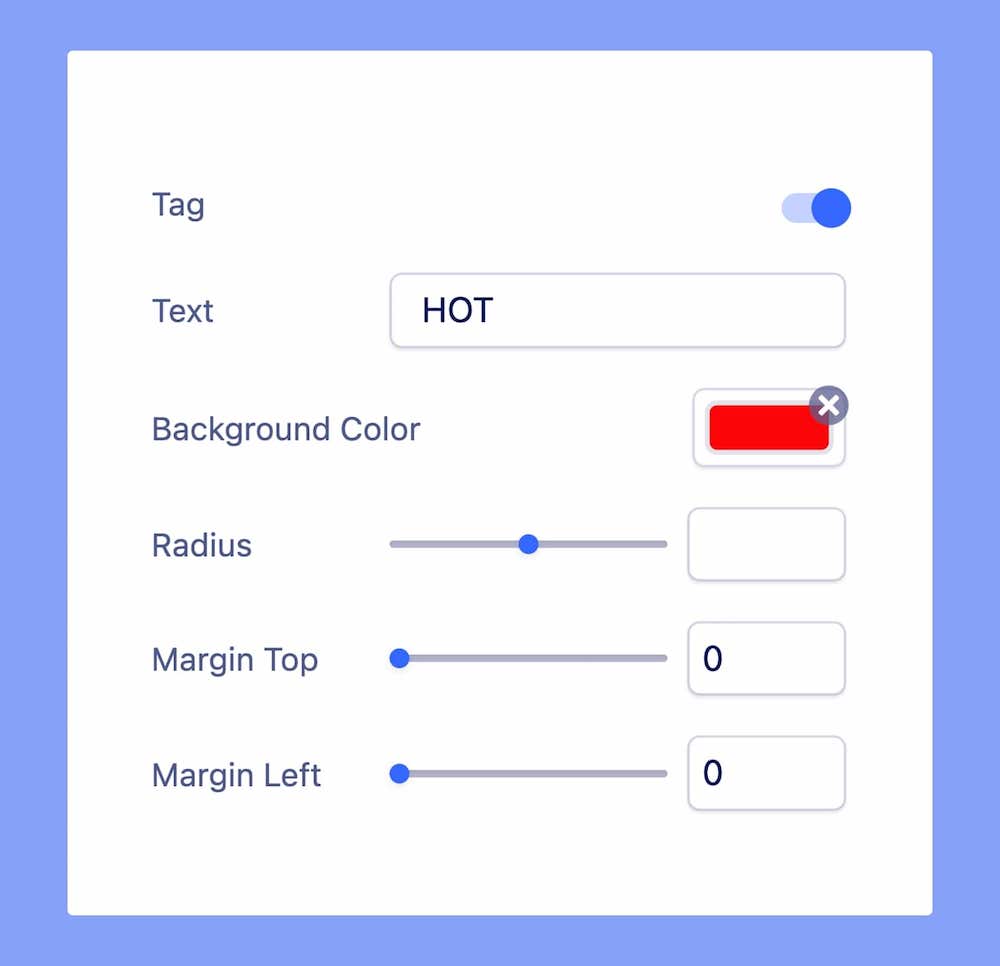
Under Media, you can also enable the Tag feature. A Tag is basically a flag label that’s used to highlight a product item.
Tag: Enable this toggle to add a Tag to your Price List. Once enabled, you’ll get to access the options discussed next.
Text: Enter the text you want your Tag to display. Common Tag include terms like “HOT”, “SALE”, etc.
Background Color: Set the Tag’s color.
Radius: Use this option to round the edges of the Tag.
Margin Top: Set the distance between the Tag’s Top Margin and the Media’s Top Margin.
Margin Left: Set the distance between the Tag’s Left Margin and the Media’s Left Margin.

